 Drea

Imagine it, you’re standing at Shibuya Crossing as thousands of people flow around you like water, then two days later you’re soaking in a mountain onsen watching snow fall on ancient cedar trees. That’s Japan, and this 3-week Japan itinerary (which flexes easily to 2 weeks) is built to help you experience all of it. It’s a country that somehow balances neon-lit chaos with temple serenity, and it will absolutely capture your heart.
That said, whether you have two weeks or three weeks in Japan, this itinerary is designed to be flexible because here’s the thing, Japan is a vast land with so many different facets. It’s hard to see it all in one trip, but it’s also a shame if your trip only consists of one city like Tokyo or Kyoto (as fab as they may be). That’s why you really need 3 weeks in Japan.
As a first-time visitor, I wanted enough time to experience different places, while leaving plenty left to see for a return visit. I also knew I wanted to get beyond the “big three” (Tokyo, Kyoto and Osaka) and explore more of the countryside. Doing part of this trip solo, then joining up with a small group tour, gave me the best of both worlds.
For my full guide to solo travel for women over 35, start here →
For my full guide to planning and traveling through Japan, start here →
Want Your Own Custom Packing Checklist for Japan?
You’re about to learn how to plan your full 3-week itinerary, now grab it as a customizable checklist you can actually pack from. Pop your email in and it’s yours, free.
My 3-Week Japan Itinerary (Flex to 2 Weeks)

This 18-day itinerary doesn’t count your travel days, so leave room for a those if you can get away for a full three weeks (depending on where you are coming from). It forms the backbone of a full 3-week Japan trip, and trims down neatly to 2 weeks if that’s all you have (fun fact – I nearly called and changed my flight two days before I left because I just wanted more!)
In this Japan travel guide, you’ll get a sense for everything you need to think about when planning your trip, including a day-by-day play of my itinerary, and some fun facts of things I’d wish I’d known before I went. I made the mistakes, so you don’t have to!
In This Guide to 3 Weeks in Japan
Best Time to Visit Japan for Your 3-Week Itinerary
🌸 Spring (45-75°F)
Spring is a great time to visit Japan, especially if you want to catch the cherry blossoms. I specifically planned my trip hoping mother nature would cooperate and bring out her blooms. Turns out she was a bit late this year, but luckily, we still had plenty of blossoms to see. That’s another benefit of a 3 week trip through Japan!
Weather can be unpredictable in March/April, therefore layers are key. We had everything from 75 degrees and sunshine, to rain, to snow! This is especially true if you visit some of the mountain towns on this itinerary or farther north.
☀️ Summer (80-95°F)
Hot, humid and sticky. Sweat is the great equalizer in the summer, so pack quick-dry fabrics and sun protection – and prepare for humidity. There may be cheaper prices during this low season, so if the weather trade-off it worth it, give it a shot.
🍂 Fall (60-75°F)
Fall might just be your ideal Japan season. With the leaves turning amazing colors, this is another popular time to visit, and the weather is perfect. My parents visited this fall, and they confirmed that fall foliage season (late October-November) brings crowds similar to spring’s cherry blossoms, but the views are stunning, and the temperature is just right. I’m actually heading there in October to see it for myself!
❄️ Winter (30-50°F)
Winter is chillier, especially up in the mountain regions. You may find fewer people and better hotel rates, so if you’re willing to brave the cold or if you want to ski or snowboard, winter is your season. Temps vary by region, so be sure to layer up and check temperatures at every city you are visiting.
Transportation

Getting around Japan is easier than you might think, thanks to their world-class public transit. You’ll want a SUICA card (add it to your iPhone wallet before you go!), and depending on your route, possibly a JR Pass. For the full breakdown on transportation, SUICA setup, and airport transfers, check out my 10 Essential Japan Travel Tips.
Pre-Trip Planning Checklist for a 3-Week Japan Itinerary
Documentation and Apps
- Visit the Japan Web registration website (no visa needed for US citizens <90 days)
- Download some key apps: Google Maps, Google Translate, SUICA app, Airalo eSIM
For more info on these apps and what else to know, read my article on 10 Essential Japan Travel Tips.
Booking Your Accommodations
Honestly, book 3+ months ahead for spring/fall travel. Looking for the best rates with VIP perks like upgrades, room credits, and more? Contact me to book and benefit from my Virtuoso partnerships.
Packing Smart
Bring a carry-on roller for easy train station navigation, use my 431 packing method, and prep for your season. Here’s my complete Japan packing guide for every season.
Complete 3-Week Japan Itinerary: Day-by-Day (Works for 2 Weeks Too)
Days 1-4: Tokyo
Days 5-10: Mountain Towns (Nikko, Hakone, Takayama)
Days 11-12: Hiroshima & Miyajima Island
Days 13-16: Kyoto
Days 17-18: Osaka
Travel days on the front and back of this trip make it a full 3 week trip, but you can easily add more days in these locations to have 3 weeks in Japan. More on how to do that is in each section below.
Stage 1: The Big City – Tokyo! (Days 1-4)
In stage 1 of your 3-week Japan itinerary, make the most of arriving in the big city! Here’s how I structured my Tokyo days. For detailed neighborhood guides, restaurant recommendations, and insider tips, see my complete 5 Day Tokyo Itinerary.
Days 1-2: Central & Traditional Tokyo
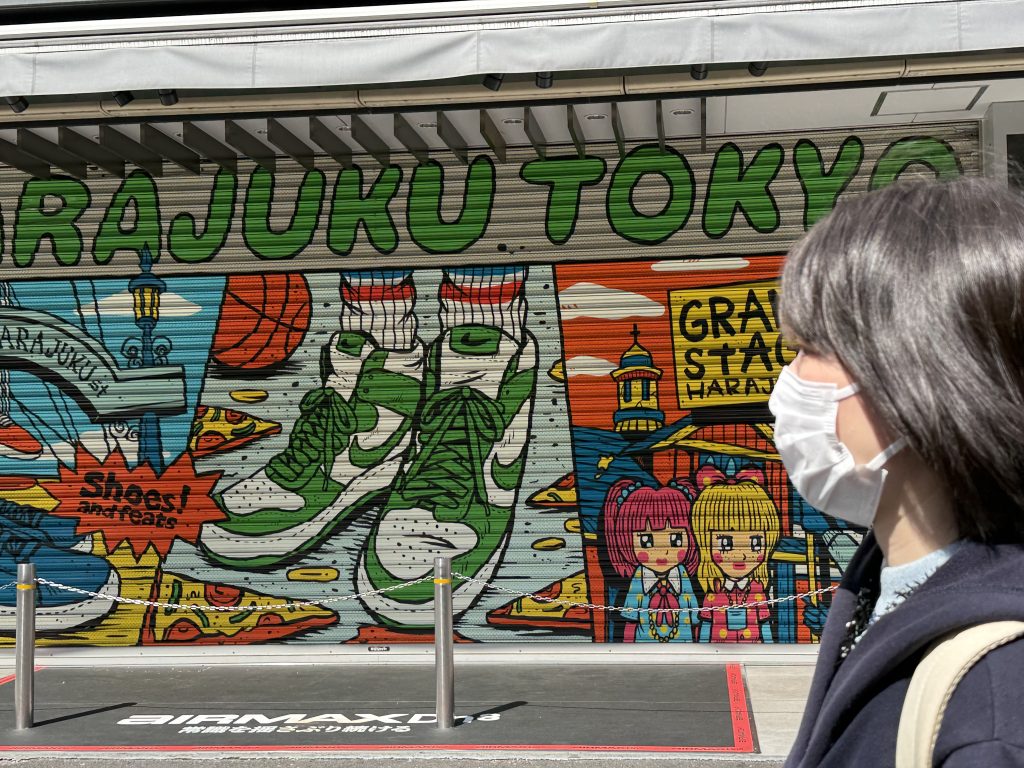
Day 1: Central Tokyo – Harajuku & Shibuya: Dive into Tokyo’s electric energy at Harajuku’s quirky Takeshita Street, browse the stylish shops along Cat Street, then experience the controlled chaos of Shibuya Crossing. It’s good to balance the sensory overload with a peaceful stop at Meiji Shrine and the Sakurai Tea Experience.

Day 2: Traditional Tokyo – Asakusa & Ueno:Shift gears completely as you explore Tokyo’s traditional side. Wander Asakusa’s Senso-Ji Temple and browse the food market stalls, visit the quirky Otter & Hedgehog Café, and then catch a sumo wrestling experience if you can time it right.
Days 3-4: Modern + Imperial Tokyo

Day 3: Roppongi & Tokyo’s Sky-High Views: Experience Tokyo’s sophisticated side in Roppongi (think art galleries, serene shrines tucked between skyscrapers, and that futuristic digital art wonderland at teamLab Borderless that’ll blow your mind). A nice way to end your day is with Tokyo Tower lit up against the night sky, and if you’re lucky (unlike me with that private party!), catch sunset from the MORI Tower observation deck.
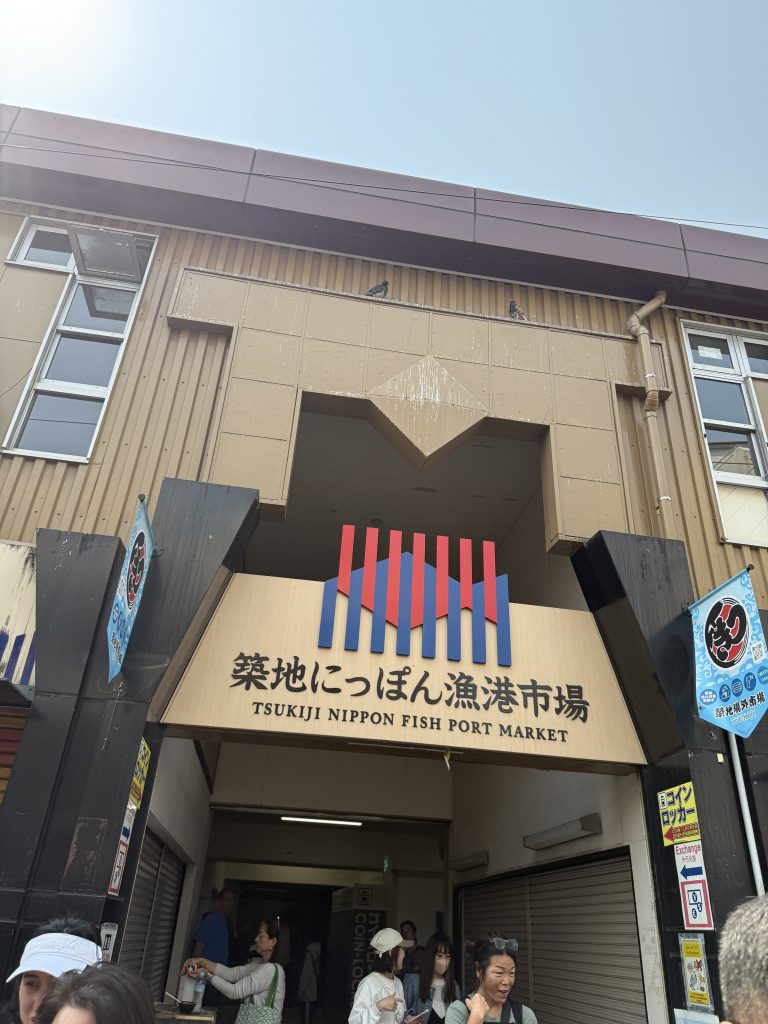
Day 4: Imperial Tokyo & Tsukiji Market: Your last Tokyo day takes you through Japan’s imperial heart. Explore peaceful gardens surrounding the Imperial Palace, cherry blossom-lined moats at Chidorigafuchi, and the architectural marvel of Tokyo Station. Start early at Tsukiji Fish Market for the freshest sushi breakfast of your life, then work off those calories wandering Yasukuni Shrine and Kitanomaru Park.
Stage 2: Mountain Town Magic (Days 5-10)
For stage 2 of your 3-week Japan itinerary, now that you’ve had a good dose of city life and seen quite a bit of what Tokyo has to offer, it’s time to take a breath and head for the hills (literally). As a result, the next few days will give you a totally different view of Japan. Spoiler alert – these were some of my favorite stops of the whole trip!
Accommodation tip: These towns are perfect for traditional ryokans with tatami mats, kaiseki dinners, and private onsens. Book early!
Days 5-6: Nikko

Nikko is where Tokyo tourists go to breathe. This ancient forest town sits 2 hours north with UNESCO shrines, stunning waterfalls, and your first traditional ryokan experience.
How to Get There: Take the direct train from Tokyo’s Asakusa Station via Tobu Nikko Line, 2 hours.
Why Two Days?
The elaborate Toshogu Shrine deserves a leisurely half-day alone. Add Lake Chuzenji, Kegon Falls, and the mystical Kanmangafuchi Abyss with 70 Jizo Buddha statues, and you’ve filled two days comfortably. This is your first taste of mountain Japan’s slower pace, so enjoy it. Rushing defeats the purpose.

First-Timer Fit: After intense Tokyo days, Nikko provides perfect decompression and introduces you to ryokan culture before even more remote mountain experiences.
Sites: Toshogu Shrine, red-lacquered Shinkyo Bridge, Rinnoji Temple, Lake Chuzenji, Kegon Falls, Kanmangafuchi Abyss
🏨 Accommodation: Prime ryokan territory. Book traditional inns with tatami mats, onsen baths, and kaiseki dinner included (¥15,000-25,000/person with meals).
Days 7-8: Hakone
Hakone is a scenic hot springs resort in Mount Fuji’s foothills, famous for onsen culture, art museums, and (weather permitting) pristine views of Japan’s most iconic mountain – Mt Fuji!
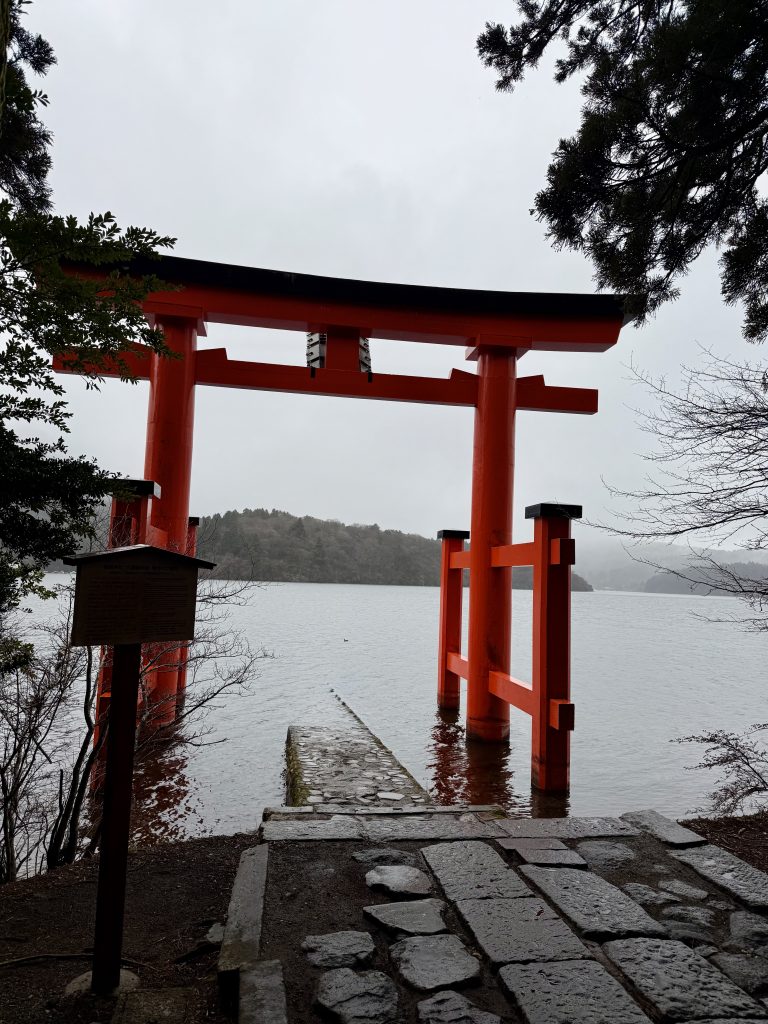
How to Get There: From Nikko, return to Tokyo (2 hours) then take the Odakyu Romance Car from Shinjuku to Hakone (90 minutes).
Why Two Days?
The “Hakone Loop” combines boats, cable cars, and ropeways in a full-day circuit: pirate ship across Lake Ashinoko, ropeway to volcanic Owakudani valley with boiling sulfur springs, then descent past mountain museums. That frees up day to let you properly soak in your ryokan’s onsen, visit Hakone Shrine’s floating torii gates, and give Mount Fuji two chances to emerge from her clouds.
First-Timer Fit: Perfect mid-trip balance of active sightseeing with built-in downtime. Your best shot at seeing Mount Fuji up close.

Sites: Lake Ashinoko pirate ship, Hakone Ropeway with Mount Fuji views, Owakudani volcanic valley (try the black eggs!), Hakone Shrine’s red torii gates, Hakone Open-Air Museum, Pola Museum of Art
🏨 Accommodation: Splurge on a ryokan with private onsen in your room. Hakone is where this makes most sense (¥20,000-40,000/person with meals).
Days 9-10: Takayama

Takayama is the Japanese Alps’ best-kept secret. This beautifully preserved Edo-period town is nicknamed “Little Kyoto” for its traditional architecture, minus Kyoto’s crowds. As a result, you can discover sake breweries, morning markets, and that slower mountain-town charm.
How to Get There: From Hakone, return to Tokyo then take the JR Limited Express Hida to Takayama (4.5 hours total). It’s a long but stunning ride (the train winds through mountain valleys).
Why Two Days?
Takayama’s magic isn’t checking off sights. It’s wandering the Sanmachi Suji district, leisurely browsing the morning market twice (it changes daily!), and getting delightfully lost in the old town. Then, on day two you can take a Shirakawa-go day trip or simply soaking in the mountain atmosphere with sake tastings.

First-Timer Fit: Your deepest countryside dive before the intensity of Hiroshima and Kyoto. Shows you daily Japanese life in a working mountain town that happens to be achingly beautiful.
Sites: Sanmachi Suji historic district, morning markets (go both days!), sake brewery tours, Takayama Jinya, Higashiyama Walking Course, optional Shirakawa-go day trip
🏨 Accommodation: Consider a minshuku (family-run guesthouse) for intimate hospitality, or traditional ryokan (¥12,000-20,000/person with meals). Book within walking distance of old town.
Stage 3: Historic Cities (Hiroshima, Kyoto & Osaka) (Days 11-18)
Stage 3 of your 3-week Japan itinerary takes you through the historic and traditional cities that are big enough to stand alone.
Days 11-12: Hiroshima + Miyajima Island
Day 11, Hiroshima

Hiroshima stands as both Japan’s most sobering reminder and its most inspiring resurrection story. The city targeted by the first atomic bomb in 1945 is now a vibrant, modern metropolis. So, it’s a testament to resilience every first timer should witness.
How to Get There: From Takayama, take the JR Limited Express Hida to Nagoya (2.5 hours), then Shinkansen to Hiroshima (2 hours). Total: 4.5-5 hours.
Why Two Days?
The Peace Memorial Museum deserves 2-3 hours minimum, and emotionally you’ll need processing time. Miyajima Island the next day balances the heaviness with natural beauty and playful deer.
First-Timer Fit: Where your trip gains depth. You’ll understand the resilience woven into Japanese culture. Heavy but essential.
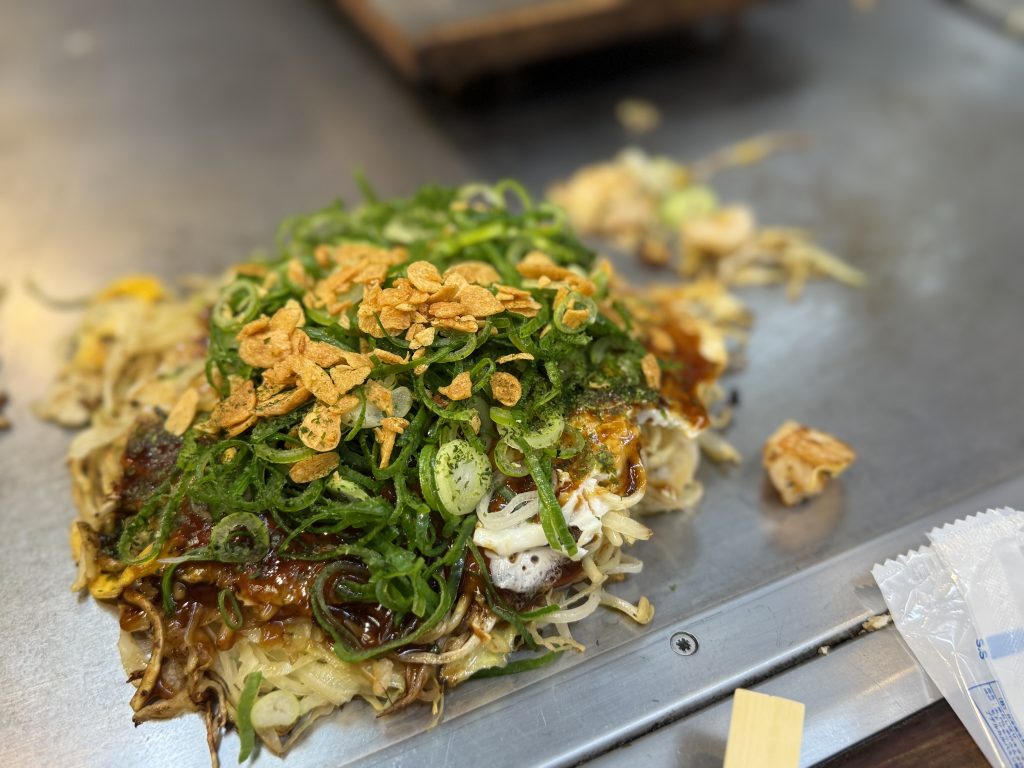
Sites: Peace Memorial Park, A-Bomb Dome ruins, Peace Memorial Museum (arrive early), riverside walks, okonomiyaki dinner at multi-floor spots with hibachi-style grills
Pro Tip
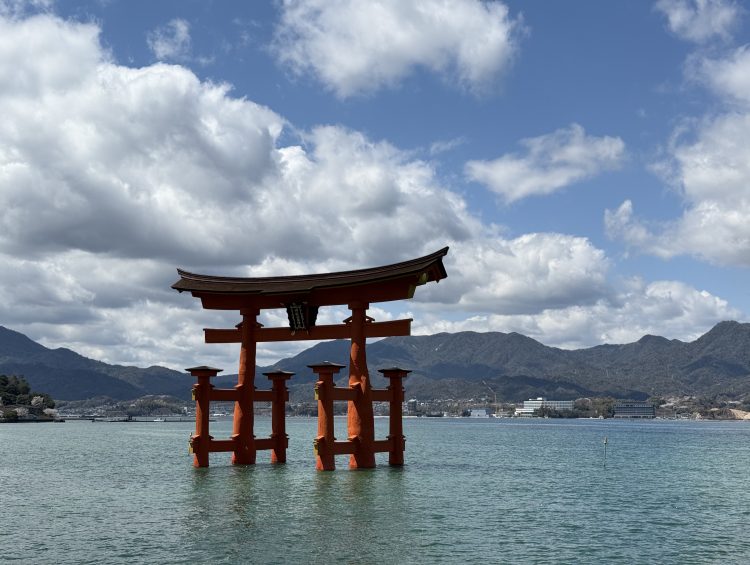
Check the Miyajima tide chart before you go. At high tide the torii gate looks like it’s floating; at low tide you can walk right out to it. Both are worth seeing, so if you can, time your visit around when the tide turns.
Day 12: Miyajima Island
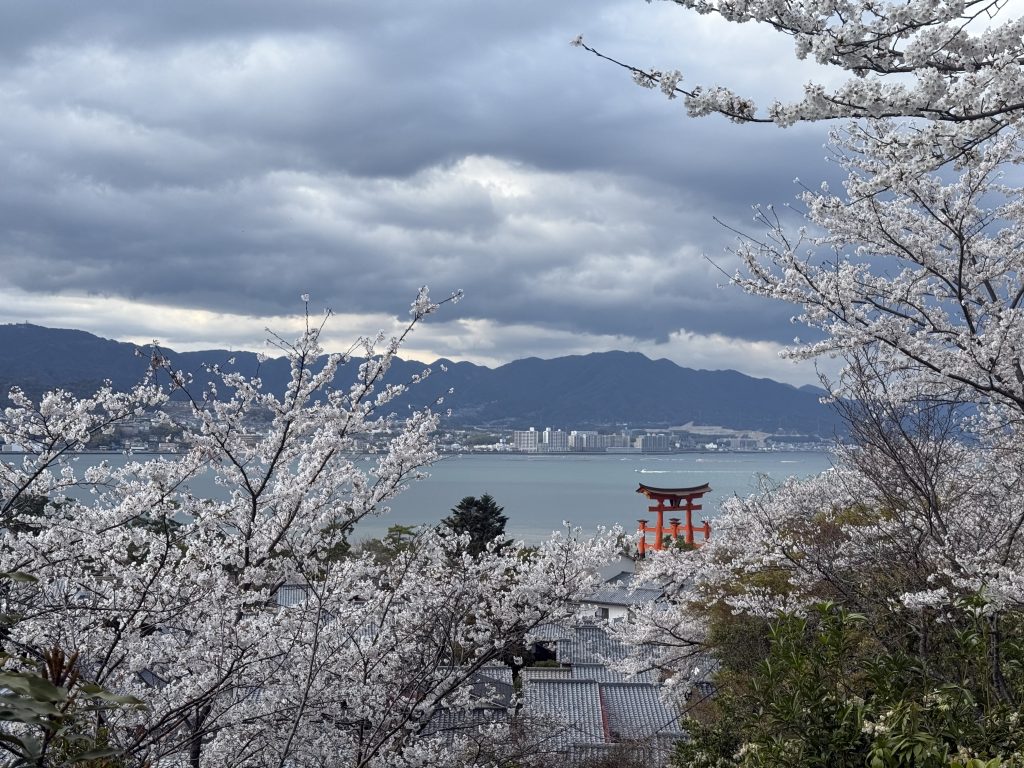
How to Get There: 30-minute train to Miyajimaguchi + 10-minute ferry (JR Pass covers both). Easy day trip.
Sites: Famous “floating” Itsukushima Shrine torii gate (see it at both high and low tide!), friendly deer everywhere, Mount Misen ropeway for 360° Inland Sea views, Momijidani Park. Spring cherry blossom trails on hillsides are magical. In fact, we saw some of the trip’s most stunning blossoms here.
🏨 Accommodation: Book modern hotel in Hiroshima city center near Peace Park or Hiroshima Station (¥8,000-15,000/night). After mountain ryokans, a western bed might feel refreshing.
Days 13-16: Kyoto – Temples, Gardens & Timeless Beauty
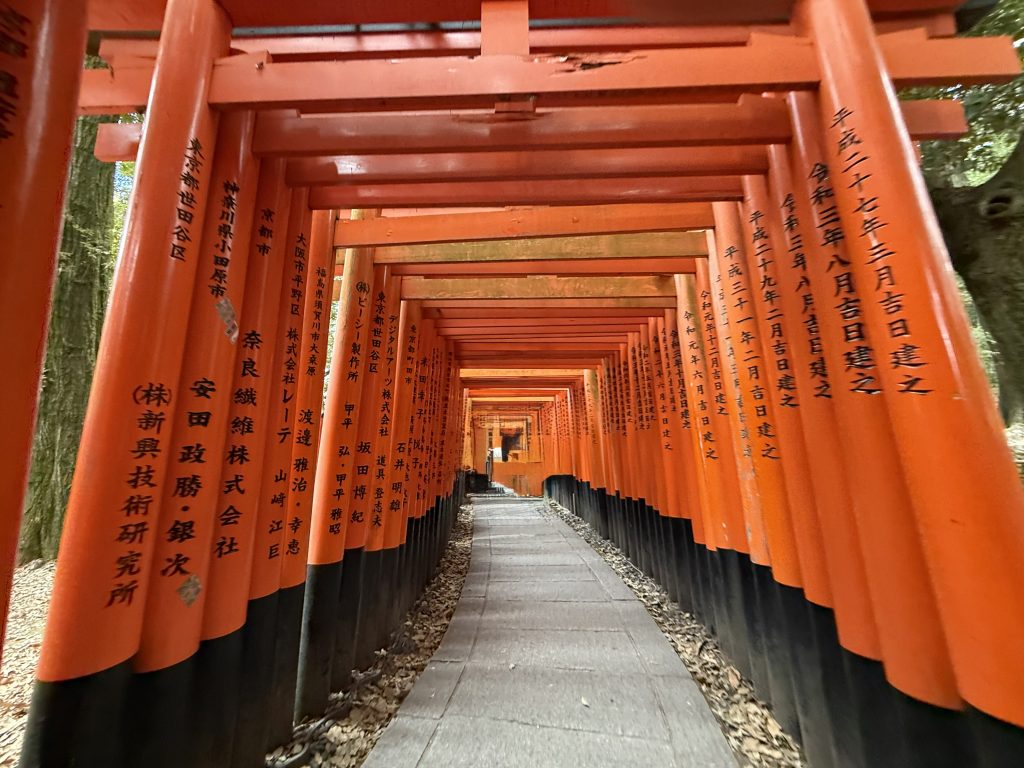
Kyoto is Japan’s cultural heart. Over 1,000 years as imperial capital left behind 17 UNESCO sites, golden pavilions, zen gardens, thousands of vermillion torii gates, and geisha districts where history lives in every stone-paved alley.
How to Get There: Shinkansen from Hiroshima to Kyoto, 2 hours.
Why FOUR Days?
Because Kyoto has more temples than you can count, and even four days barely scratches the surface. As a result, four days give you the greatest hits (Golden Pavilion, Fushimi Inari’s endless gates, Arashiyama bamboo forest, zen gardens) plus breathing room to discover hidden temples.
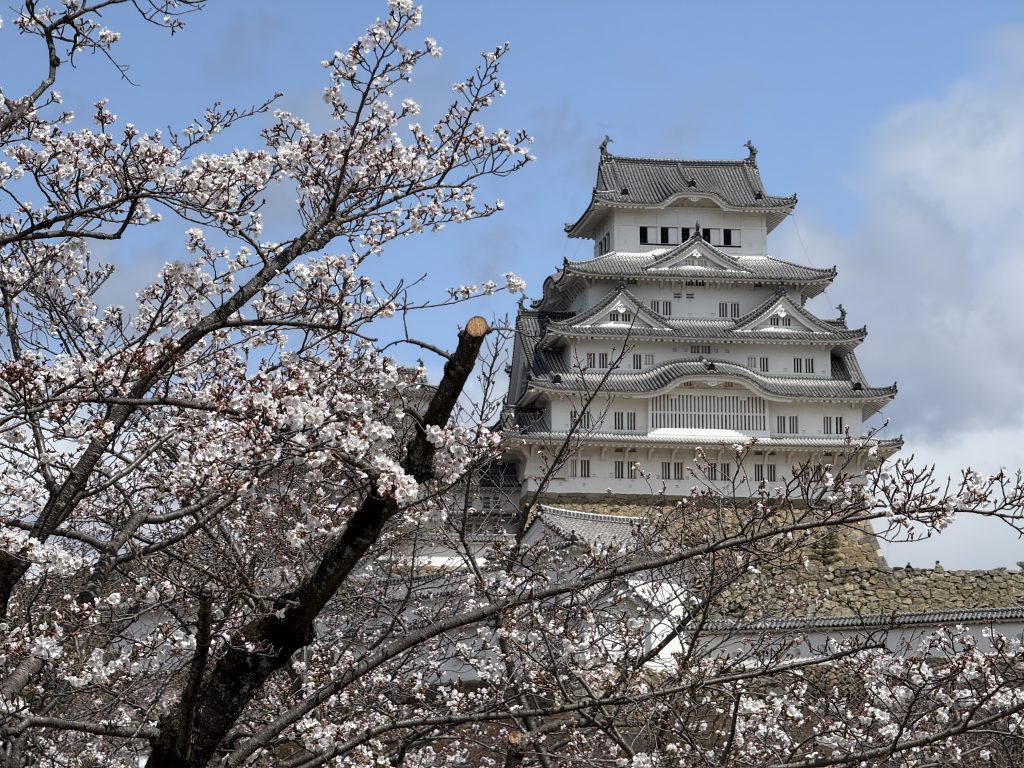
First-Timer Fit: After Hiroshima’s emotional weight, Kyoto offers beauty and contemplation. You’ll finally understand Japanese aesthetics. How nature and architecture intertwine, the concept of wabi-sabi, and why people travel halfway around the world to sit in moss gardens.
Optional Stop En Route: Himeji Castle: The Shinkansen passes through Himeji, home to Japan’s most spectacular castle. It’s gorgeous from the outside, but honestly? I regretted going inside. It was too crowded, and not very scenic. That’s why I’d prefer to spend 30-45 minutes on the exterior grounds instead and save time for Kyoto.
Kyoto Pacing
Day 13: Arrive in Kyoto and settle in, then take an evening stroll through Gion district to see wooden machiya houses lit up. Next, have dinner at Nishiki Market food stalls makes for a lively evening.

Day 14: Kinkaku-ji (Golden Pavilion). Arrive early before crowds. Then move onto Fushimi Inari’s 10,000 red torii gates (go 7-8am or late afternoon). Hike partway up the mountain, where crowds thin dramatically after 15 minutes of walking.
Day 15: Kiyomizu-dera Temple with gorgeous hillside city views, then onto Arashiyama’s Sagano Bamboo Grove (those towering stalks really do sing in the wind). Walk the Philosopher’s Path through cherry trees to Ginkaku-ji (Silver Pavilion) zen rock garden.
Pro Tip
Do Fushimi Inari first thing in the morning, by 7:30am if you can, because by mid-morning those 10,000 torii gates are shoulder-to-shoulder. You’ll find early light, quiet paths, far better photos. Then slow down. Kyoto rewards a temple-in-the-morning, garden-in-the-afternoon rhythm, not a race.
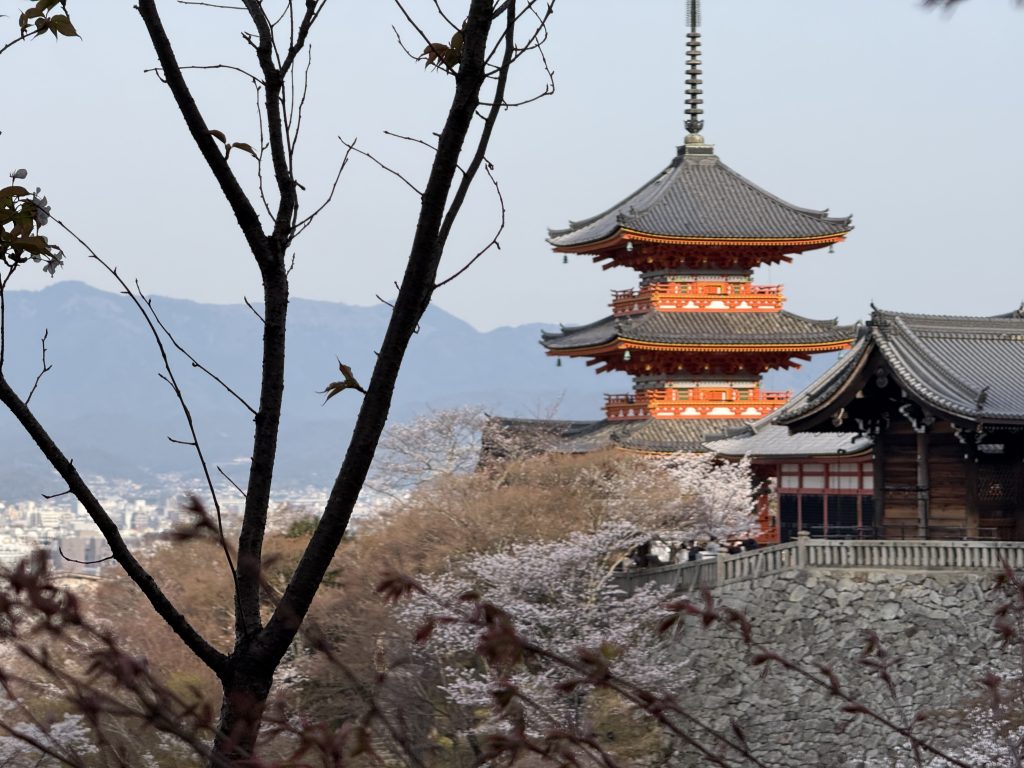
Day 16: Optional Nara day trip (45 min). See 1,200+ semi-wild deer roaming parks, and Todai-ji Temple’s 15-meter bronze Buddha. The deer bow for crackers! Alternatively, discover Kyoto’s quieter temples or take a tea ceremony class.
🏨 Accommodation: Stay centrally near Kyoto Station or Gion/Higashiyama for walkability. Mid-range hotels ¥12,000-20,000/night. Book early – Kyoto is insanely popular year-round.
Days 17-18: Osaka – Street Food & Neon Nights
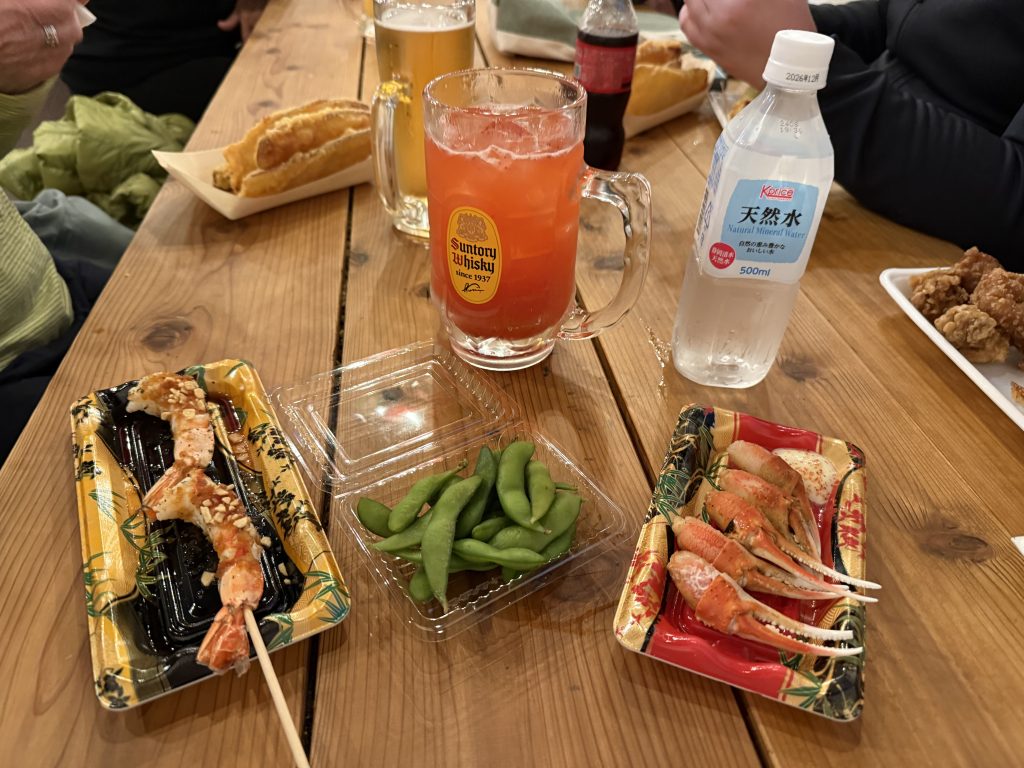
Osaka is where Japan lets its hair down. It’s the nation’s kitchen, the comedy capital, the city that invented “kuidaore” (eating yourself into ruin). After temples and contemplation, Osaka’s neon chaos and incredible food provide the perfect finale.
How to Get There: Local JR train from Kyoto, 30 minutes. Practically neighboring cities with frequent service.
Why Two Days?
Take one day for Osaka’s food scene and main districts, and one final day for last-minute shopping or simply soaking in your last Japan hours before the airport. By this point, you’ll appreciate the downshift.
First-Timer Fit: Your victory lap. You’ve mastered Japanese trains, survived Tokyo’s intensity, found peace in mountain ryokans, and absorbed centuries of culture. Now? Reward yourself with street food and neon.
Pro Tip
Come to Dotonbori hungry and eat like it’s your job. Takoyaki, okonomiyaki, kushikatsu (no double-dipping the sauce!). It’s the loudest, most delicious night of the trip. Skip the sit-down dinner and graze the stalls instead.
Day 17: Dive into Dotonbori district with its neon signs, the famous Glico Running Man, and mechanical crabs. Try takoyaki (octopus balls), okonomiyaki, kushikatsu (deep-fried skewers), and as much as your stomach allows. Visit Osaka Castle and Shinsekai retro district. Return to Dotonbori at night when lights are electric. Don’t miss Kuromon Ichiba Market for fresh seafood.
Day 18: Sleep in. Wander without agenda. Buy last souvenirs. One final incredible meal. Store your luggage at the station or at your hotel and enjoy final unburdened hours.
🏨 Accommodation: Modern hotel near Namba or Umeda stations for easy airport access (¥10,000-15,000/night). Focus on location – you want walking distance to Dotonbori for late-night adventures.
Transporting Luggage
I recommend bringing a roller carry-on you can easily bring on trains and up/downstairs. They also fit better in smaller Japanese hotel rooms. Read more about what luggage I brought here.
If traveling with luggage is too daunting, or you are committed to bringing a bigger bag, Japan has amazing luggage transport services. Many hotels will ship it to your next destination at a fairly low cost. Just make sure you verify when it will arrive at your next destination and have a day’s worth of clothes on you in case (Japan is known for its prompt and efficient processes, but it’s good to be prepared).
Cultural Tips & Etiquette
Temple & Shrine Etiquette: Keep your shoulders covered, stay silent during services, and carry coins (¥100-300) for offerings and fortunes.

The Coin Economy: You’ll need coins constantly – at temple offerings, train station lockers, vending machines, and small shops. Get a dedicated coin purse and treat ¥500 coins (about $3.50) as real money, not throwaway change.
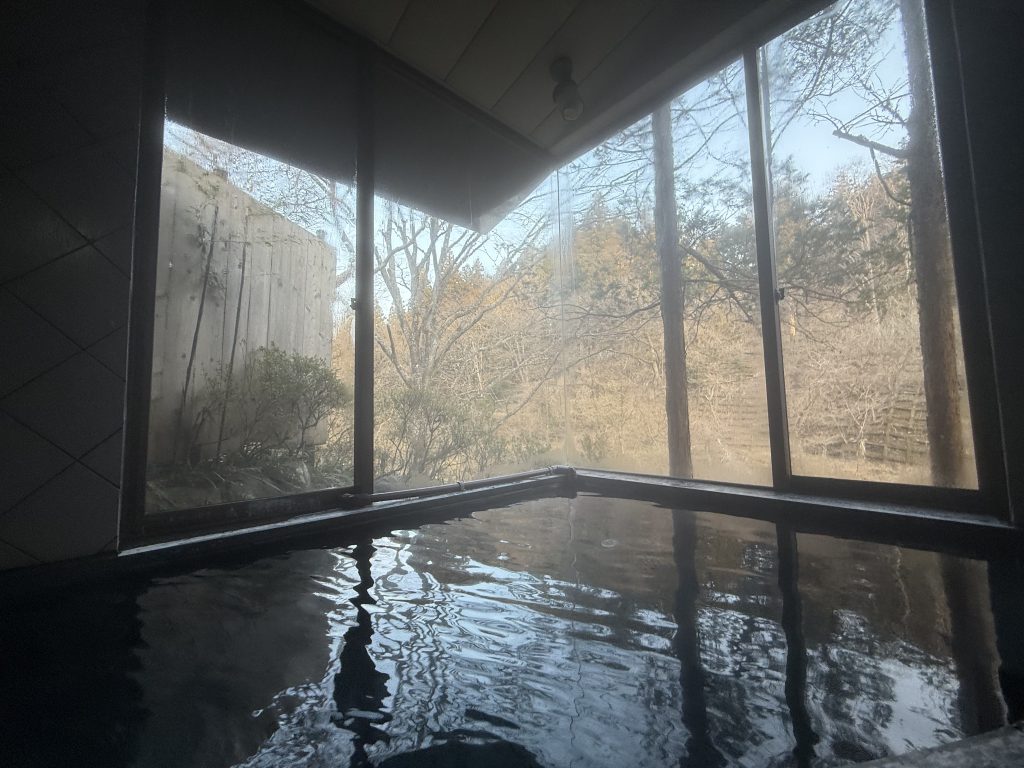
Onsen Rules: Shower completely before entering communal baths. Be sure to bring your small modesty towel in but don’t let it touch the water (fold it on your head). No swimsuits. Yes, it feels vulnerable at first. The experience is worth it. Tattoos are increasingly accepted at private/tourist onsens but may be prohibited at traditional public baths. Always ask beforehand and have band-aids on hand in case they let you cover them up (mine did)!
Pro Tip
Buy a little coin purse on Day One. Temple offerings, coin lockers, and vending machines all run on coins, and that ¥500 coin is real money (about $3.50). You’ll build a heavy pocketful faster than you’d think.
Public Transportation Manners: Queue in orderly lines – cutting is incredibly rude. Once on trains, stay quiet. No phone calls (step off at the next station if you must).
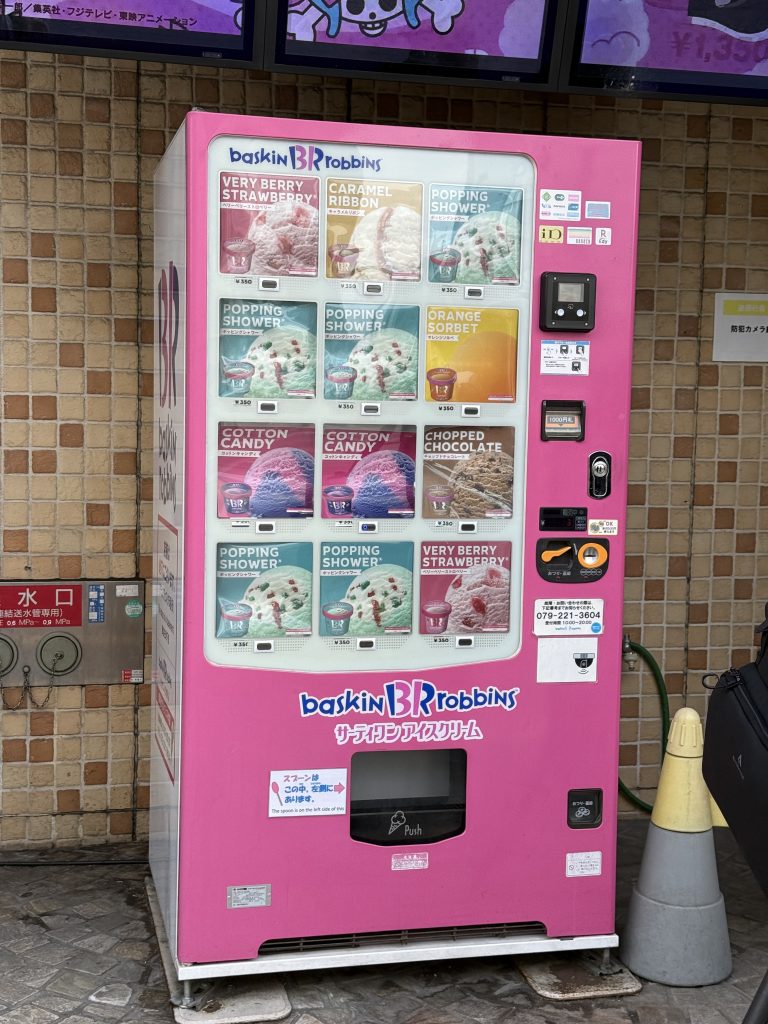
No Eating/Drinking While Walking: Buy a drink (or an ice cream) from a vending machine? Stand there and finish it. Exception: street food markets where eating-while-strolling is the whole point (Takayama, Nishiki Market). I’d often pause in front of 7-Elevens to sip water, then continue on.
No Tipping: Do not tip anywhere – restaurants, taxis, hotels. It can be considered insulting.
Shoes Off Constantly: Wear slip-on shoes and presentable socks. You’ll remove shoes at temples, ryokans, and some restaurants constantly.
Food Experiences Not to Miss

Japan’s regional specialties should guide your dining choices:
Tokyo: Don’t miss conveyor belt sushi for an approachable introduction, depachika (department store basement food halls) for stunning variety, tiny ramen shops with lines out the door, and standing bars for yakitori and highballs.

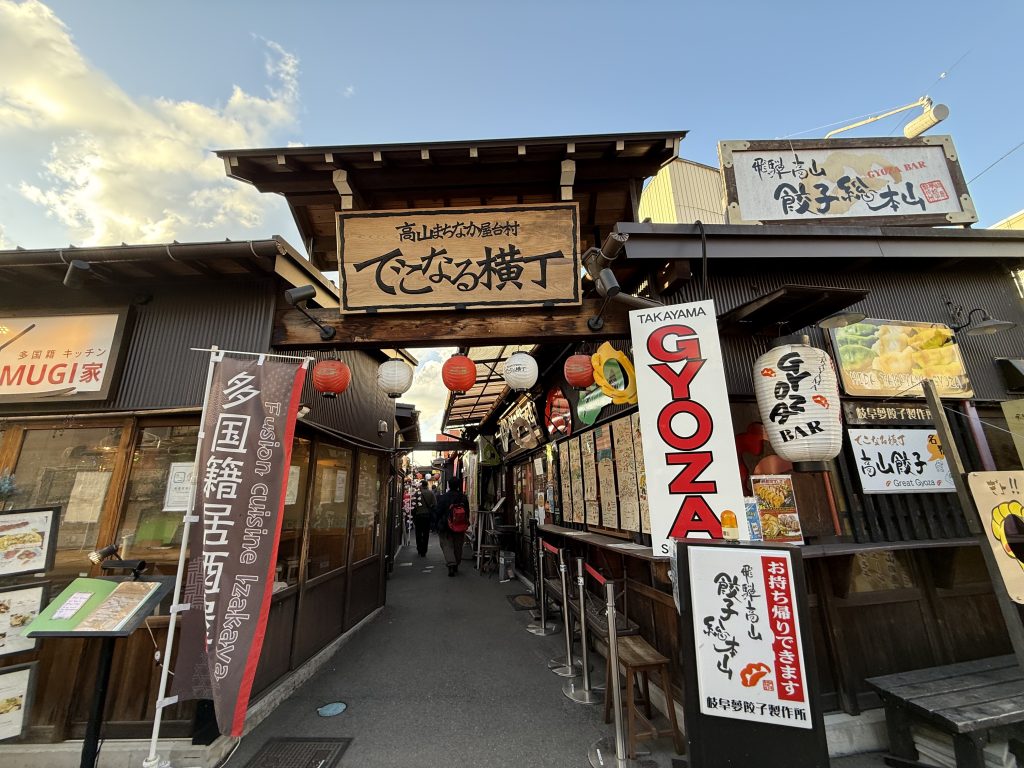
Mountain Towns: Kaiseki dinners at your ryokans are elaborate multi-course meals. Don’t skip these! Takayama’s morning market offers Hida beef skewers, fresh mochi, and local vegetables. Sample sake at local breweries (mountain water makes exceptional sake). Finally, try cold soba (buckwheat noodles) with dipping sauce.
Tipping Culture
Tipping at restaurants in Japan is NOT a thing. In fact, it can be insulting. Simply pay the total and save those coins for your temple visits.
Hiroshima: This is okonomiyaki HQ. This layered savory pancake with cabbage, egg, soba noodles, and meat/seafood is grilled in front of you. You’ll find buildings with multiple floors of okonomiyaki restaurants, sit around the grill, and embrace the messy, communal experience.
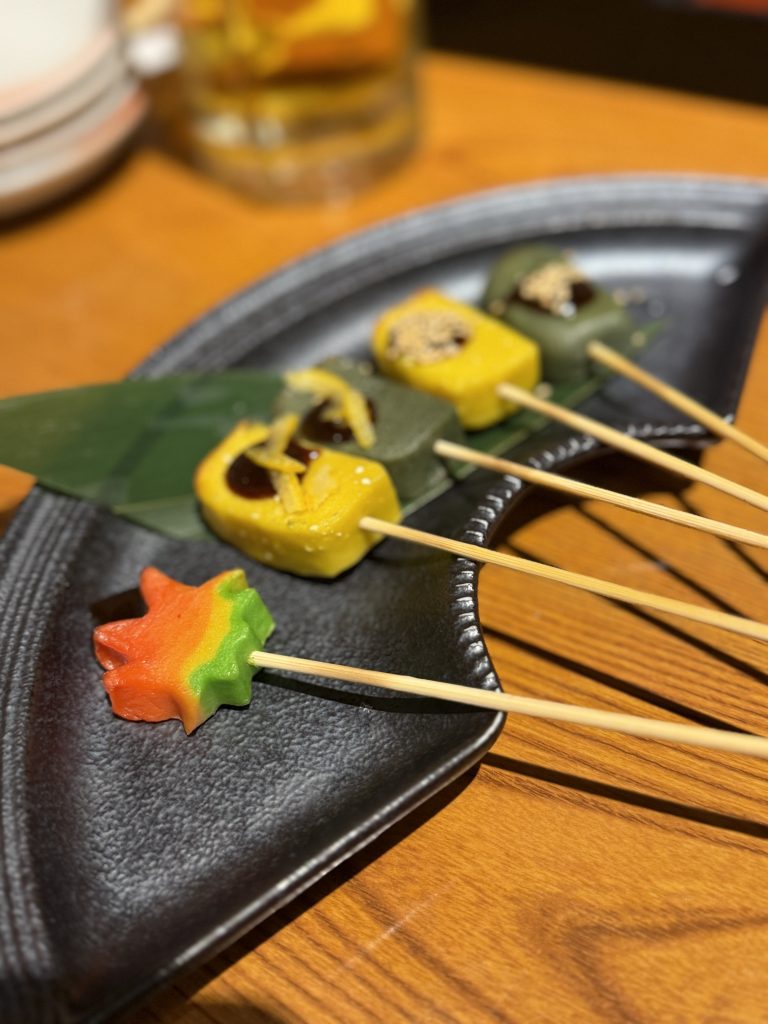
Kyoto: Head to Nishiki Market for yudofu (silky tofu), tsukemono (pickled vegetables), matcha everything, and fresh seafood. Consider one splurge kaiseki meal. It reaches its peak here. Matcha soft serve at Arashiyama is mandatory.
Osaka: This is the places you “kuidaore” (eat till you drop.) Dotonbori district offers takoyaki from street carts, kushikatsu (deep-fried skewers—dip once only!), okonomiyaki (mixed vs. Hiroshima’s layered), and 2am ramen. Kuromon Ichiba Market opens early for incredibly fresh sushi.
Budget Tips: Convenience stores have shockingly good food. Lunch sets cost 40-60% less than dinner. Budget for one memorable splurge meal. These memories outlast the receipt.
Money & Practical Tips
Japan is increasingly card-friendly, but cash still rules outside major cities.
The Cash-Card Balance: The SUICA card covers most transportation and convenience stores. Credit cards work at chains, hotels, and major attractions. The reality is that cash is still essential for small restaurants, temples, local shops, markets, and taxis. I found I used 70% cards, 30% cash.
Getting Cash: ATMs at 7-Eleven (open 24/7) and post offices accept international cards. Most Japanese bank ATMs don’t accept foreign cards. Withdraw ¥10,000-20,000 ($70-140) at a time. Avoid airport currency exchange (terrible rates).
SUICA Loading: Load in ¥5,000 ($35) increments. I reloaded 3-4 times over 18 days.
Daily Budget Ranges (excluding accommodation):
- Budget: ¥5,000-8,000/day ($35-55): convenience stores, lunch sets, street food
- Mid-range: ¥10,000-15,000/day ($70-105): sit-down meals, museums, souvenirs
- Comfortable: ¥20,000+/day ($140+): nice dinners, shopping, splurge experiences
Coin Purse Essential: ¥500 coins (about $3.50) are common. Don’t treat coins as throwaway change.
Credit Cards: Visa/Mastercard widely accepted. Choose to be charged in Yen (not your home currency). Tell your bank you’re traveling to make sure they approve the charges.
Tax-Free Shopping: Many stores offer 8% savings on purchases over ¥5,000. Bring your passport so you can qualify.
What I Wish I’d Known Before Going
After just over 2 weeks in Japan, here are six insights I wish someone had told me.
1. Japan Is Quieter Than You Think. Embrace It
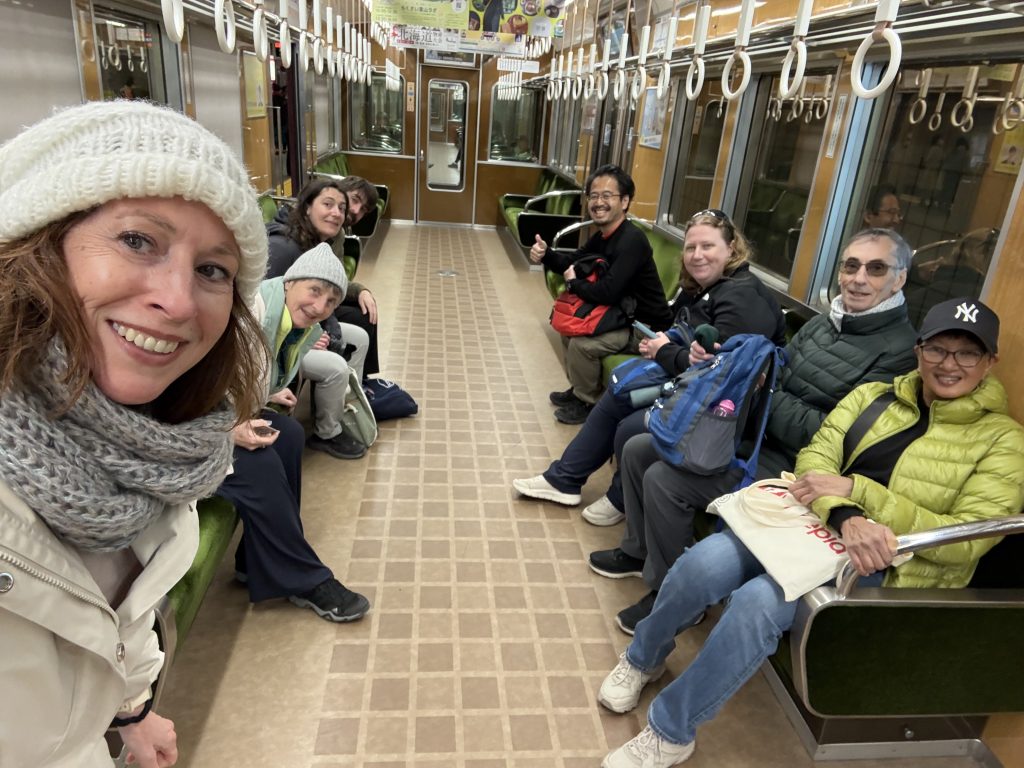
Japanese culture values quietness in public (on trains, in restaurants, walking streets.) Everyone speaks in near whispers, if at all. I discovered this creates remarkably peaceful atmosphere even in crowded cities. You’ll hear temple bells, distant conversations, and wind through the gardens. One more reason to visit.
2. Cherry Blossoms Are Wildly Unpredictable. Build Flexibility

I timed my trip for peak sakura. Mother Nature ran 10 days late. The good news? Visiting multiple cities in Japan over 18 days meant I eventually caught stunning blossoms in Hiroshima and Miyajima. Honestly, if cherry blossoms matter, book 3 weeks across regions rather than one week in one city. Same for fall foliage. Nature doesn’t follow schedules.
3. The Mountain Towns Were My Favorite Surprise
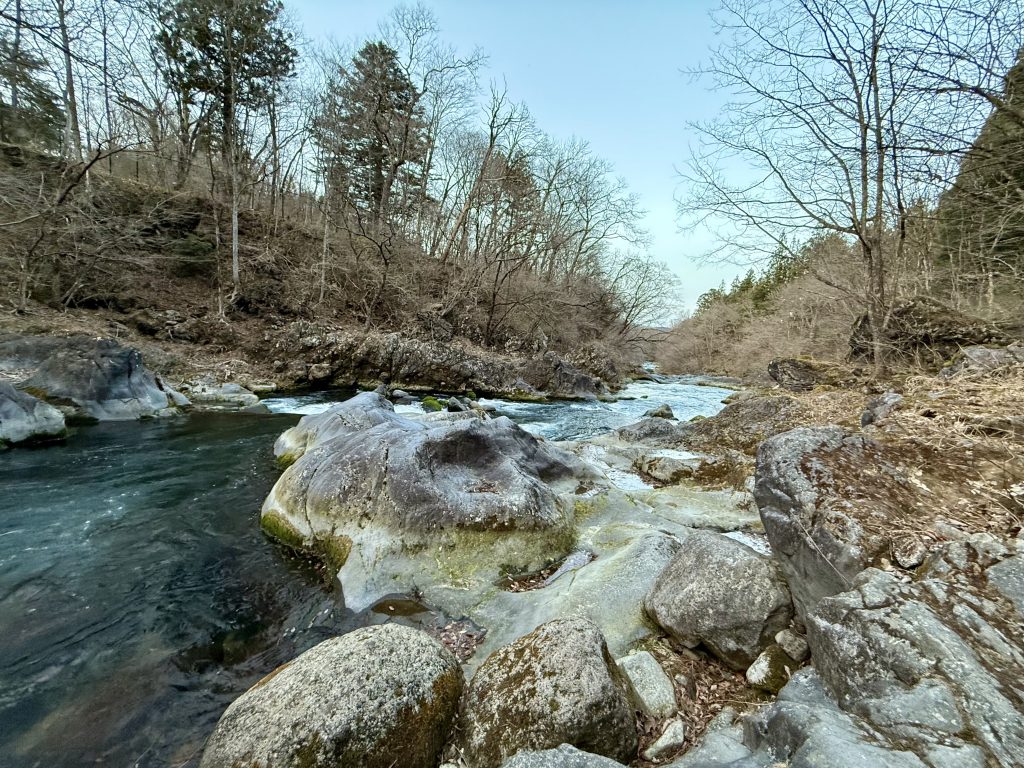
Everyone talks about Tokyo and Kyoto. But Nikko, Hakone, and Takayama captured my heart with actual quiet, intimate experiences, forest air, and restorative pace. So if you’re tempted to cut your itinerary for another Tokyo day, don’t. The mountain stage is where Japan stole my heart.
4. Ryokan Check-In Times Are Strict
Most ryokans have 3-5pm check-in, with kaiseki dinners at specific times (usually 6pm). This isn’t hotels where you show up whenever. On ryokan days, plan to arrive mid-afternoon or you’ll miss dinner.
5. Coins Aren’t Just Change. They’re Essential Currency
That ¥500 coin? Real money (about $3.50.) Temple offerings, coin lockers, vending machines need coins. Get a coin purse Day One.
6. A 3-Week Japan Itinerary Beats a 2-Week One

Two days before departure, I almost extended my flight. To be fair, this itinerary gives excellent variety, but it’s still just a taste. If you can swing three full weeks instead of 2.5, do it. Or accept that Japan will lure you back (I’m already planning another trip for next year!)
Read more about what I learned in 10 Essential Japan Travel Tips and 10 Things to Avoid in Japan.
FAQs
Conclusion & Next Steps

This 3 week Japan itinerary gave me the perfect first taste of Japan. I had high-tech cities, peaceful mountain ryokans, and enough historic culture to understand why this country captivates travelers. And here’s the truth: I’m already planning a trip back, and I know it won’t be my last. That’s what Japan does to you.
Ready to start planning your own adventure? I offer custom Japan itinerary planning that fits your travel style, whether you want more cities, more mountains, or a food-focused route. Let’s chat about your perfect Japan trip.
And if you’ve already been to Japan? I’d love to hear what surprised you most. Drop a comment below!
Wherever you go and however you get there, I hope you have a trip to remember.
Happy travels, Kindreds!
RELATED POSTS
- For my full guide to planning and traveling through Japan, start here
- Japan was a Bucket List trip for me, but there’s different solo trips to take based on what you’re looking for. Here’s 6 Kinds of Solo Trips to Take
- Now that you know my 3 week itinerary for Japan, check out my 10 essential Japan Travel Tips to help you make the most of your visit.
- Once you know the best advice, check out the the Japan advice I think is overrated
- For more info on Tokyo, drill into my detailed 5 day itinerary for Tokyo here.
- Only have 3 days to spare? Take a look at My Exact 3-Day Tokyo Itinerary
- Then take a look at how to spend 4 days in Kyoto + Nara
- For all details on what to pack and how to use my 431 system, read my article outlining What to Pack for Japan.
- I did the Tokyo part of this trip solo, and the rest with an Intrepid Travel small group. For more info on traveling solo, check out 10 Reasons to Travel Solo.
- If group travel may be more your thing, take a look at 10 Things You Didn’t Know About Group Travel.
HELPFUL LINKS
Ready to book? Here are some helpful resources for navigating Japan.
- Work With Me
- Need help planning your 2026 travel? Contact me here for personalized itinerary assistance!
- Want more information on the benefits of using a travel advisor? Learn more here
- Get Travel Insurance in case something does go wrong or your plans change. Contact me for a personalized insurance quote.
- Need help planning your 2026 travel? Contact me here for personalized itinerary assistance!
Japan-Specific Resources
- Entry:
- CDC Travel Health for entry and medication guidelines cdc.gov/travel.
- State Department Travel Resources for documentation requirements travel.state.gov.
- Visit Japan Web allows you to perform arrival procedures (immigration, customers) and ‘tax-free shopping status’ online before you arrive. Made entering the country much easier!
- Transportation:
- Suica card is the jack of all trades. Transportation, stores and some restaurants accept this digital currency. It can even be used offline if your phone batter gets low.
- I added an electronic version to my Apple Wallet. Open Wallet app -> Click ‘+’ to add a new card -> Select ‘Transit Card’ -> search for SUICA and select it -> click ‘Add New Card.’I’ve read you may now be able to add a digital version in the Google Wallet app as well, so if you have an Android, give that a try.
- JR Pass you may nor may not need this one. I didn’t need it, but if your routes have several JR lines, it may be worth it to save money.
- Purchasing it directly from JR Pass allows you to reserve seats and may give more flexibility. Buying from resellers like Klook may give you cheaper options but be sure to check details and restrictions.
- Suica card is the jack of all trades. Transportation, stores and some restaurants accept this digital currency. It can even be used offline if your phone batter gets low.
- Japanese Language Translation:
- Calculator app on iPhone for currency, weight and temperature conversions
- Duolingo and Babbel for learning regional language variations
- Google Translate for real-time translation – Pro tip: download the local language when connected to wi-fi, so you aren’t dependent on connectivity when out and about
HELPFUL LINKS
Here are my go-to resources for flights, packing, planning, and staying connected:
- Airalo eSim – was key for using my phone while not paying for crazy international charges. Made using google maps, making reservations, etc easy and cost-effective: https://www.airalo.com Promo code: ANDREA68732 for $3 off
- For my favorite luggage I used to navigate Tokyo’s train stations: https://www.awaytravel.com
- Great app for Japanese events and booking (found a cool cherry blossom event here that I didn’t see anywhere else): https://www.klook.com
- Event and car bookings: https://www.viator.com
- Hotel and activity comparison: https://www.tripadvisor.com
- Group travel: I did part of this trip with Intrepid, a small group tour company, and highly recommend them! https://www.intrepidtravel.com
- Custom trip planning: Need help planning your Japan adventure? Contact me here for personalized itinerary assistance!